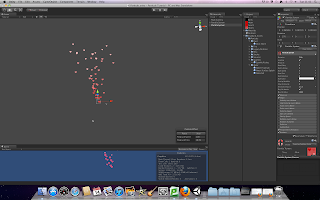
As this was our first time using Unity I first wanted to get used to the software before doing anything on it, as I did not know it capabilities. During this time I used the software to create a number of different things that ranged in skill level to help familiarise myself with the program further.
Creating a Character
To begin with I started by adding in a basic first person controller to be able to get used to the physics of the game engine; but there are a lot of settings that can be changes, like how fast the character moves and how high they can jump. I started this by adding in a plane so that my character would have a surface to walk on and once I was comfortable with the way it moved I added in a few cubes to maneuver around.
Practice Terrain
Before looking at anything else I then added in a terrain, using the create terrain tool. I made sure it wasn't too big and then started to pull and push up the landscape. It reminded me a lot of the Zoo Tycoon games which worked in a similar way to this, which where always a joy to create and took me on a memory trip at the same time. I used the original raise and lower terrain tool to begin with to create the main body of the land, I then used the set terrain height to create a completely flat piece of land at one side and then used the smooth tool to made the entire level smooth.
Texturing Terrain
Once I had created a few different levels of terrain I had a quick play around with some of the terrain tools in terms of texturing so that I could get used to the different things that could be added into the scene.
Tree Placement Tool
After I had played around with the terrain tools, I noticed a tool that randomly placed trees which was excellent if you were creating a forest scene or anything that required a lot of trees in the same place that could be randomly placed and randomly generated.
Skyboxes
I then played around with a few different skyboxes which would sit in my scene. There where a few already installed but I gained a few more with the extra terrain assets that we were given and I added in a few to see which ones worked best and looked the most realistic.
Invisible Walls
I then moved onto looking at invisible walls. These are used in most video games as to stop the player from being able to get into certain places and will be something that I will probably include in my own work as to make it clear people are not allowed to go to places. I did this by adding in a cube, making it go across the length of where the character can't go and then taking off the mesh renderer so that it is invisible.
Particle Simulation: Fire
I then had a play around with the particle simulator which I used to be able to create a fire. I used different particles and combined this with different setting and a picture of fire which turned out brilliantly. To be honest this particular test looks fantastic and will also work really well in my own scene.
Particle Simulation: Hearts
I then had a quick look at a more complicated particle system, where I used a set of 4 different heart shapes ranging in colour and size. I used the same principle as the fire simulation but this time the hearts would start off large at the base, and also be red, and then move upward getting smaller and turning to pink. It was a very simple little animation but it worked really well and I was very happy with the result.


No comments:
Post a Comment